There is no hiding our excitement over this week's post, because it features a Maryland local event coordinator AND a DIY! Seriously, our dream post!
We absolutely adore Rachel from Rachel Kendall Events. She's a super talented event coordinator that incorporates DIY into her business. For Rachel's full planning wedding clients, she even offers the ability to hangout with her and create. You get to be taught by a pro AND have a handcrafted element to your wedding day. Like we said: DREAM!
Below, Rachel breaks down her process to creating unique signs that can be used in your wedding, your home, or even as gifts! We love how much fun Rachel had with this post and we now want to go grab a bottle of wine and sit down with her to craft!
Be sure to check out her website for more information and to have her plan your wedding OR next event. We don't want to waste any more time gushing, we'll let Rachel and her amazing Arcylic Sign DIY speak for itself.
DIY Acrylic Welcome Sign by Rachel Kendall Events
This month I’m sharing with you a D.I.Y tutorial on how I make Acrylic Wedding Welcome Signs for some of my Full Planning couples!
Obviously, you can use this tutorial to make any type of signs, artwork for your home, presents for family/friends, etc. Below I will post some photos of artwork I recently made for my husband & my bedroom using the same process.
I hope you enjoy and please tag Rachel Kendall Events if you use this tutorial to make your own masterpieces. I would love to see them!
Materials Needed
- Acrylic/Glass [sizing depends on your project]
- Paint Pens [whatever colors you desire. I used White & Gold in this project]
- Photoshop or some type of design program
- Printer
- Printer Paper
- Ruler/Measuring Tape
- Tape
- Paper Towels & newspaper [for blotting the paint pens]
- Frame [if desired]
- Easel [to show off the final product]
Step #1: Collecting Your Materials
The main material you will need is a piece of acrylic or glass any size you would like.. You can purchase a frame and use the glass that comes in it or you can do some vintage shopping to find a unique frame and order a piece of acrylic the perfect size on a site such as Professional Plastics.
You can also nix the frame and go with the ghost look of a stand-alone welcome sign on a beautiful easel [scroll to the bottom of the blog for an example]. I will say that if you are going this route for a sign at your wedding, get the acrylic instead of using real glass. It will be easier for your planner to move around the day of your wedding without the fear of breaking it or getting cut.
Once you have your acrylic/glass, collect the rest of the items above and you will be ready to get crafting!
Step #2: Find/Create Your Image!
I design my welcome signs in Photoshop, first making the file size the exact measurements of the acrylic I have purchased. For this project, the welcome sign was 22” x 18”.
Once I am happy with the design, and it’s been approved by my lovely couple, I flatten the image and save it as a PDF. Always make sure to save separate files each step of the way in case you have to go back.


Step #3: Flip the Image!
From there, I go to “IMAGE” > “ IMAGE ROTATION” > “FLIP CANVAS HORIZONTAL” to reverse the image - you will see why later! Once it’s been flipped, I save as a new PDF file.
NOTE: I have an older version of Photoshop so this might be different on your version or design program. Just google how to reverse the image as that’s the ultimate goal.


Step #4: Break Up Your Image & Print!
This might be the hardest step of the whole process, so listen closely!
I then begin to break the file up into 8.5” x 11” pieces so that they will print correctly on a full size of printer paper. I do this by going to “ VIEW” > “NEW GUIDE” and creating guides that divide the page appropriately.. For this piece, I did “VERTICAL” at 11 inches and then “VERTICAL” again at 22 inches. Then “HORIZONTAL” at 8.5 inches and “HORIZONTAL” again at 17 inches.


I select each section at a time and copy & paste it into a separate file I’ve created that is 11” x 8.5” . I then save each piece as “File Name #1”, “File Name #2”, and so on.


Once I’m done, I print all the separate files at 100% scale. This percentage could differ per printer.
NOTE: If you’re just doing an image then it’s still important to open the image in a design program and resize it to the measurements of your acrylic. Then break it up into 8.5” x 11” files and print!
Step #5: Tape, Center & Tape Again!
Once I have all the pieces printed, I tape them together like a puzzle. If they don’ t match up 100% or are cut off a little, it’s okay. You can fill in any minor gaps from knowing what the final product is supposed to look like.

Once your full image has been taped together, lay the image down and put the piece of acrylic on top of it. Use your ruler/measuring tape to make sure the image is centered in the piece of acrylic. Once it seems perfect to you, tape the paper to the acrylic so it doesn’t move while you’ re working. I sometimes tape the acrylic down to my table as well to double secure the whole project from moving!

NOTE: When you’re putting the acrylic down on your image, make sure you have whichever side you want the BACK to be facing up toward you. You will be painting on the BACK of your acrylic to make the final product look even more professional. This is why you reversed the image =)
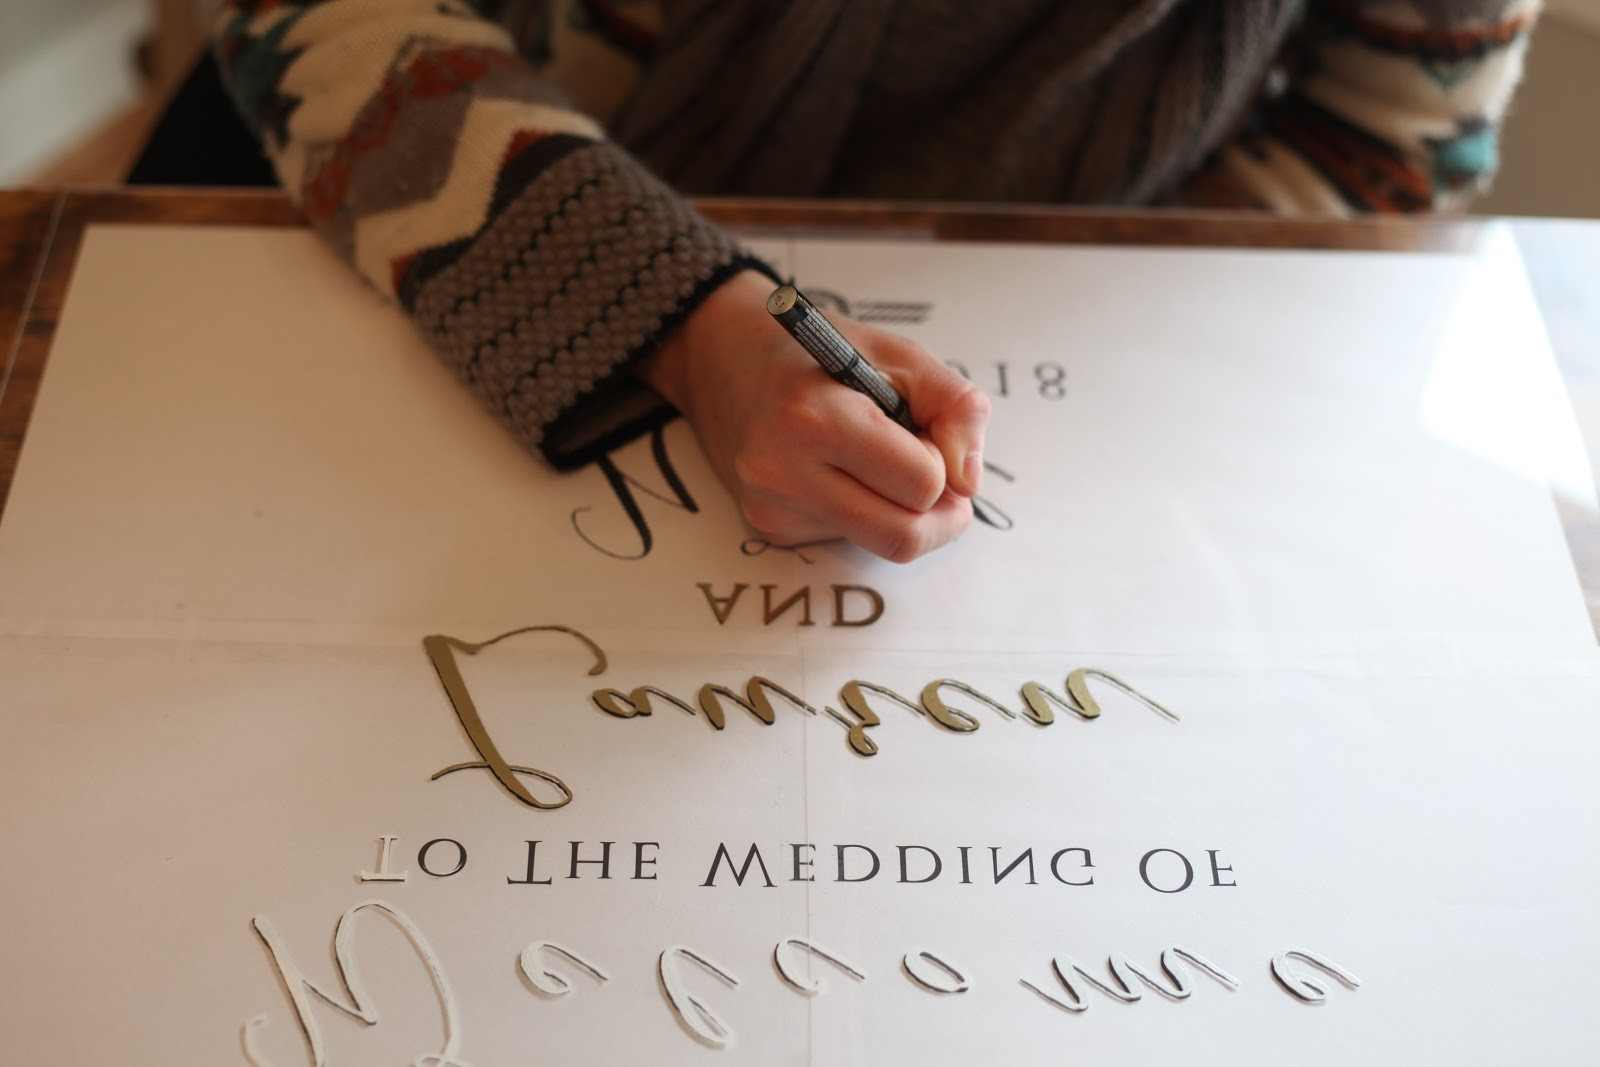
Step #6: Trace Away!
Once you’ve secured your image & acrylic, poured yourself a glass of red wine, and turned on New Girl [wait...that might just be me... ;)], you’re all set to get those paint pens out and start tracing the image!
Paint pens can be hard to get working at first. You really have to shake them and then press down for a while to get the paint out. I usually have a few layers of newspaper next to me and a paper towel on top of them to get the paint pens working well before starting on my acrylic. I put the newspaper under the paper towels because no matter how many paper towels I put down, the paint seems to seep through onto my table. Just make sure to layer and check if it’s going through. I don’t want you to ruin your favorite table!

Every time you feel the paint pen is out, make sure to blot them on the paper towels & newspaper first. There can be nothing coming out and then all the sudden a huge blob will come out quickly, which you don’t want to happen on your masterpiece! If it does though, no worries, you can just wipe it away or let it dry and use a razor blade to scrape it away carefully.
Depending on the colors you’re using and the designs, I normally end up doing two coats [especially with a white color].

Step #7: Untape and step back!
Once you’re done your coats and have let everything dry for an hour or so, it’s time to take the tape off and lift your piece up to look at it the correct way.
You can fix up any places that aren’t perfect and again, you can always take a razor blade to scrape away any unwanted paint.


Here is another wedding welcome sign and schedule sign without a frame:

Here are some photos of the artwork I created for my husband & my bedroom:


Now, get crafting everyone!
Cheers!
Rachel